SG Synergy Gold Components & Assembly
The Complete Product Manual is available for download here >

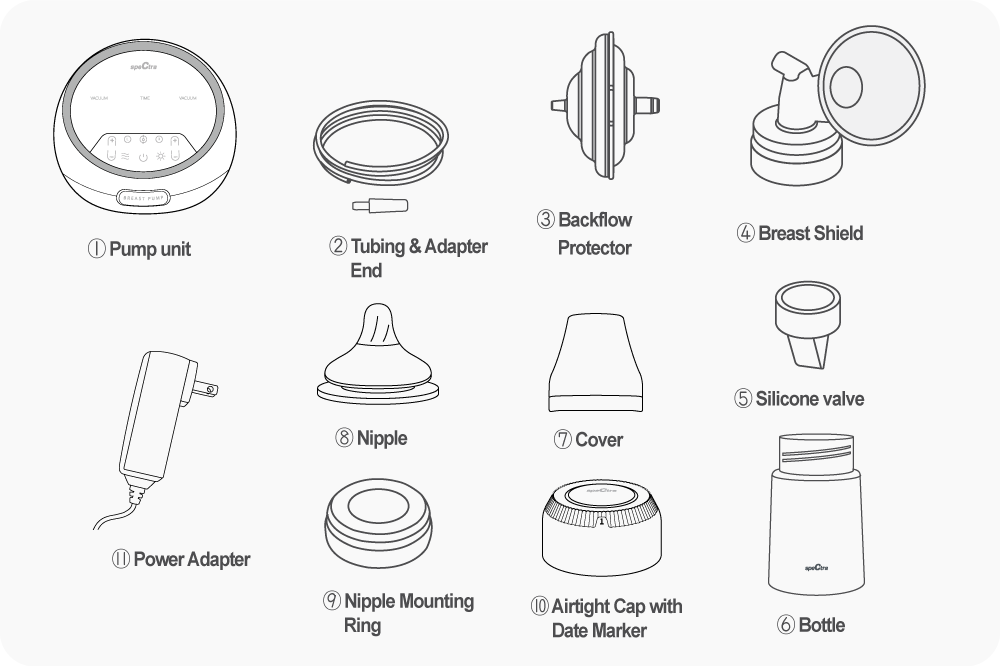
Components
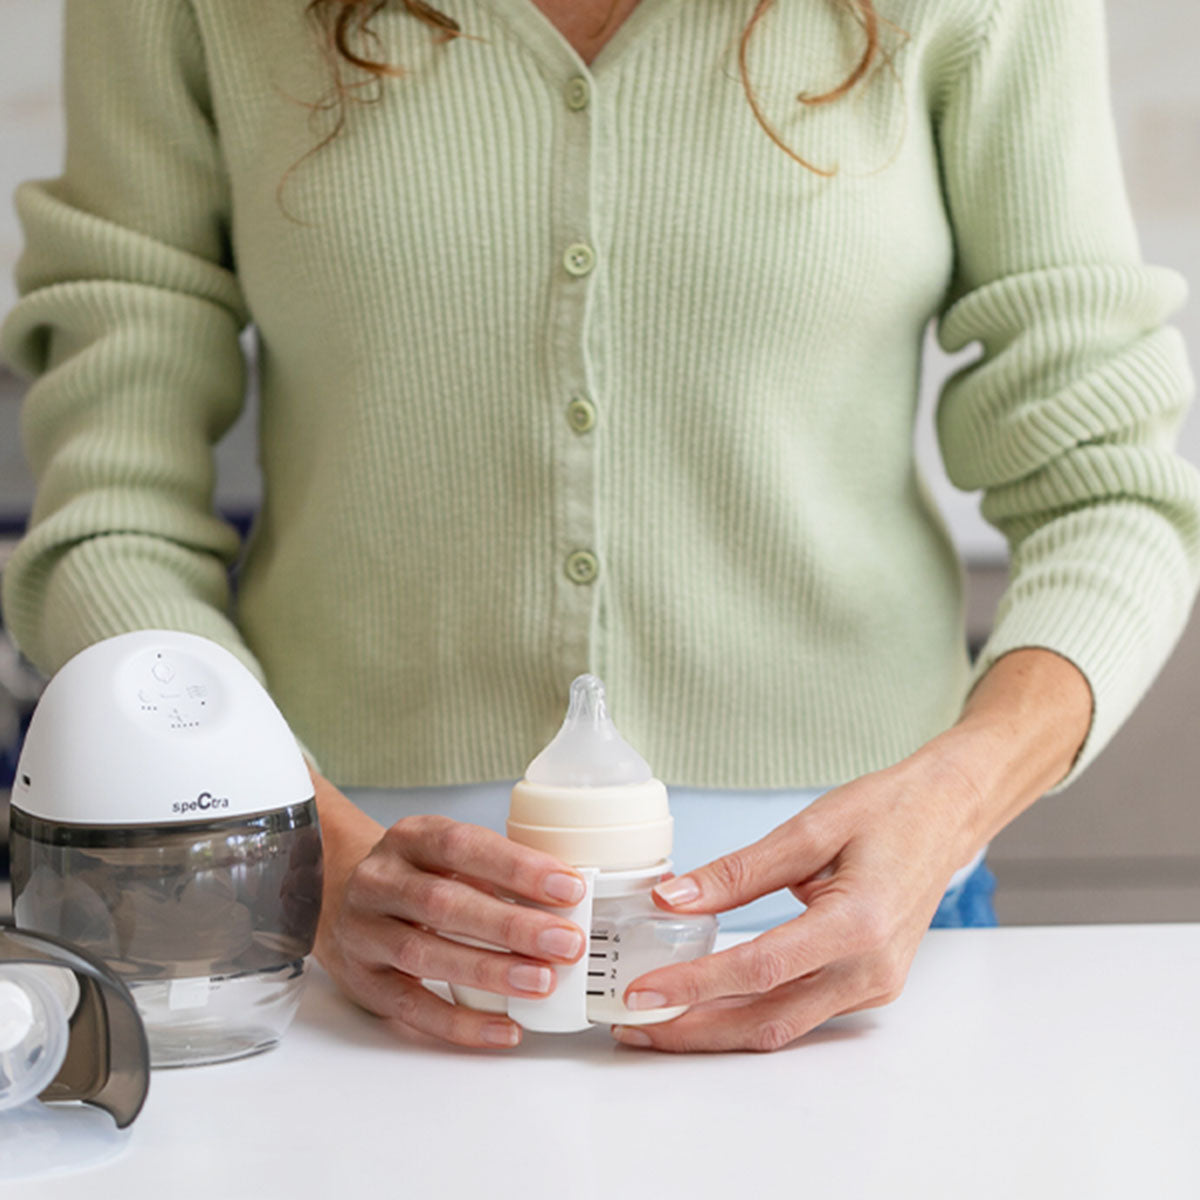
Prior to using the breast pump for the first time, sanitize the flanges, backflow protectors, silicone valves, bottles, bottle covers, and mounting rings in boiling water for 5 minutes.
These kits are designed for individual use. Never share kits.
NOTE: To prevent distortion or damage, do not boil for more than 5 minutes during sanitization process, as parts may become distorted.
1. Assemble the Backflow Protector

Backflow Protector Parts

1. Insert the white silicone membrane into lower case.

2. Insert upper case into assembled silicone membrane.
2. Finding Your Flange Size

Use a ruler, a measuring tape, or a flange guide. Measurement must be in millimeters (mm)/1cm = 10mm.
Our Flange Sizing Guide is available here.
Measure the diameter of your nipple at base, do not include areola (see picture). If the diameter of your nipple is:
- up to 12mm use 16mm flange
- up to 16mm use 20mm flange
- up to 20mm use 24mm flange
- up to 24mm use 28mm flange
- up to 28mm use 32mm flange
The 24mm and 28mm flange sizes are included with your pump. Contact Spectra Baby USA for other sizes mentioned above.
3. Assemble the Pump Kit

1. Push ⑤Silicone Valve (Duckbill Valve) onto ④Breast Flange.

2. Insert ③Backflow Protector Assembly into ④Breast Flange.

3. Screw ⑥Bottle into ④Breast Flange Assembly.

4. Insert ②Tubing into ③Backflow Protector.
4. Getting Started with Your Pump
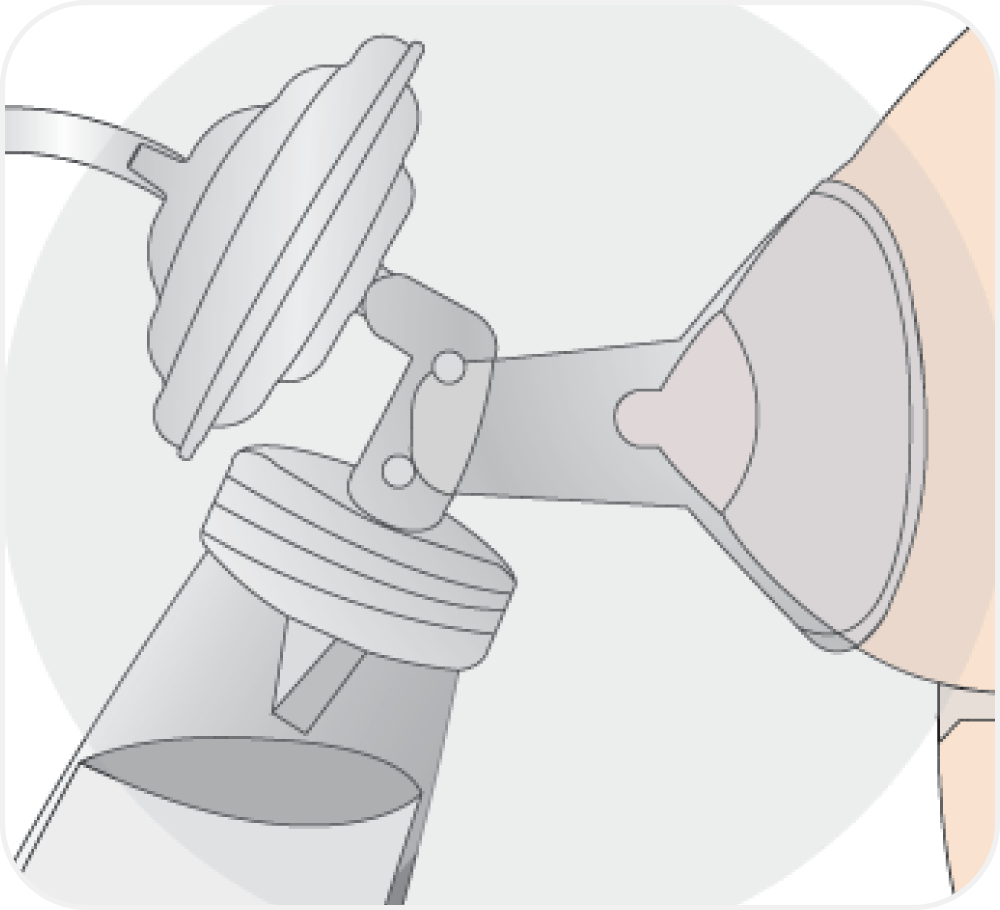
1. Center the breast flange on your nipple so that the nipple is positioned in the center of the tunnel opening without rubbing or pressing into the sides of the funnel.
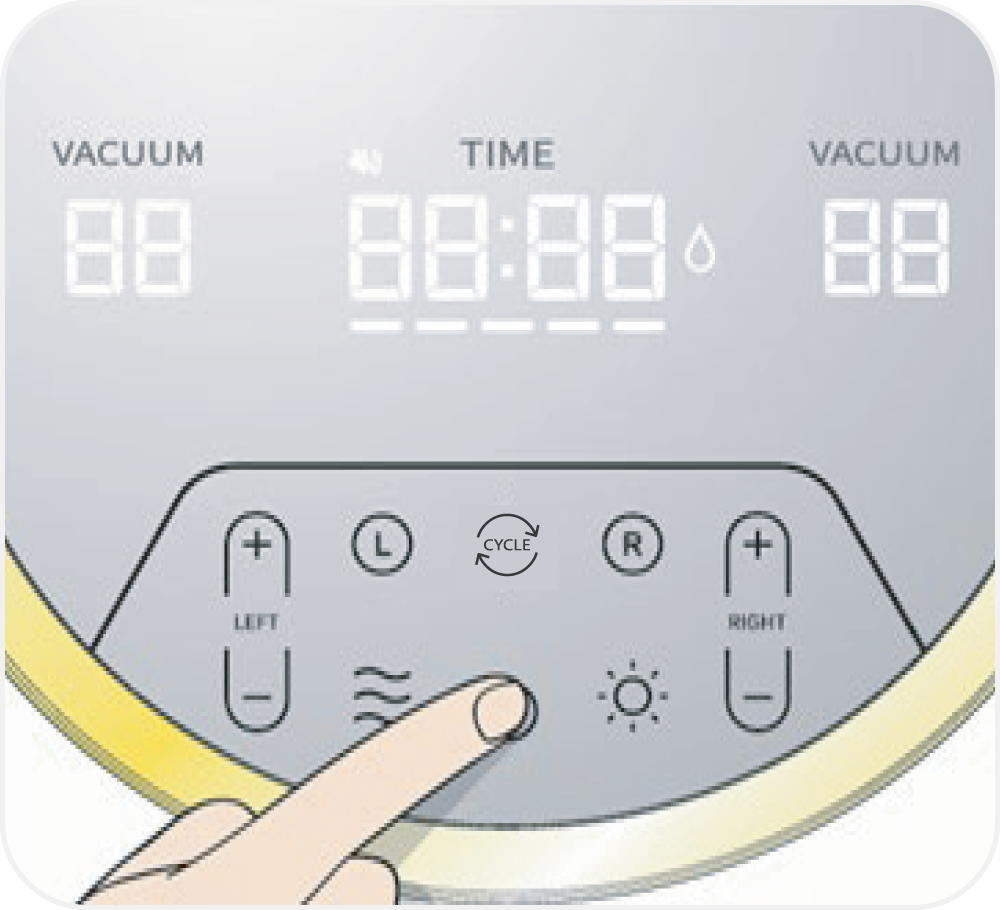
2. Press the power button. Your pump is on. The timer displays 88:88. Also displayed is the setting you used during your last pumping session: sound mode, phase mode—massage or expression, and cycle speed.
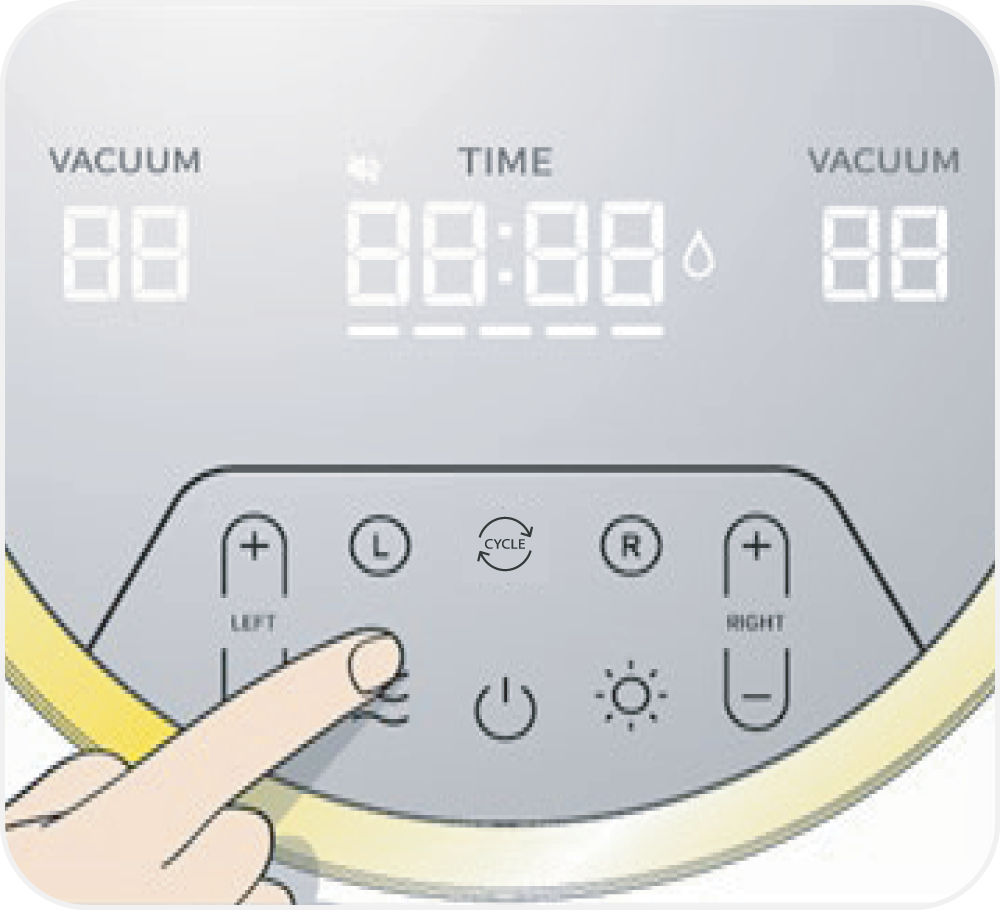
3. When your pump is on prior to starting to pump, your control panel will display the setting of your last pumping session. You can change the setting before you start your new session: Press the ≋ 3-wave button once to switch from massage mode to expression mode (vice versa). Hold it for 3 seconds to mute or unmute the beep sound that occurs when the touch button is pressed.
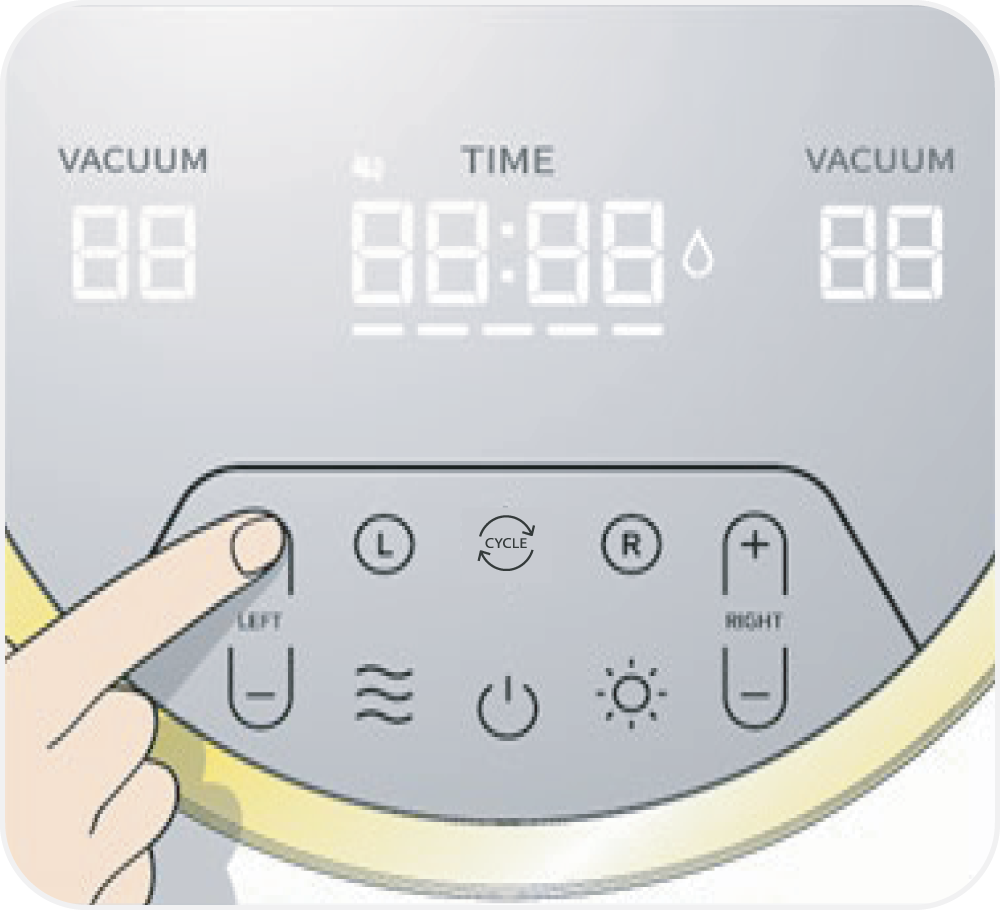
4. If you are single pumping, select which breast by pressing the L or R button. You need to select both L and R to double pump. Adjust the vacuum strength to a comfortable level by using the “+” or “-” symbol. You can also adjust cycle speed using the CYCLE symbol.
5. To stop double pumping, press the power button then remove milk collection kit from your breast(s).To stop pumping on one side, press L or R to select the side you want to turn off.

6. Once you stop pumping, twist to detach the backflow protector from the flange. Remove the flange from the milk collection bottle and close the bottle tightly with the bottle lid and store safely.
Vacuum Settings
The vacuum level is measured in mmHg on your breast pump and refers to how strongly the pump will 'suck'. Please be cautious when setting the vacuum level on the Spectra Synergy Gold. Some women find that milk expression is faster on higher vacuum levels. However, it is important not to set the vacuum level so high that it makes you uncomfortable, as the resulting pain will hinder your milk flow. We therefore suggest that you start off with the vacuum level on low, and then gradually increase the vacuum level to a comfortable level. You may find that the vacuum level that you are comfortable with varies significantly, from day to day, during the day and even during the same expression session. Adjust the vacuum level by pressing the “+” or “-” buttons.
Cycle Speed Setting
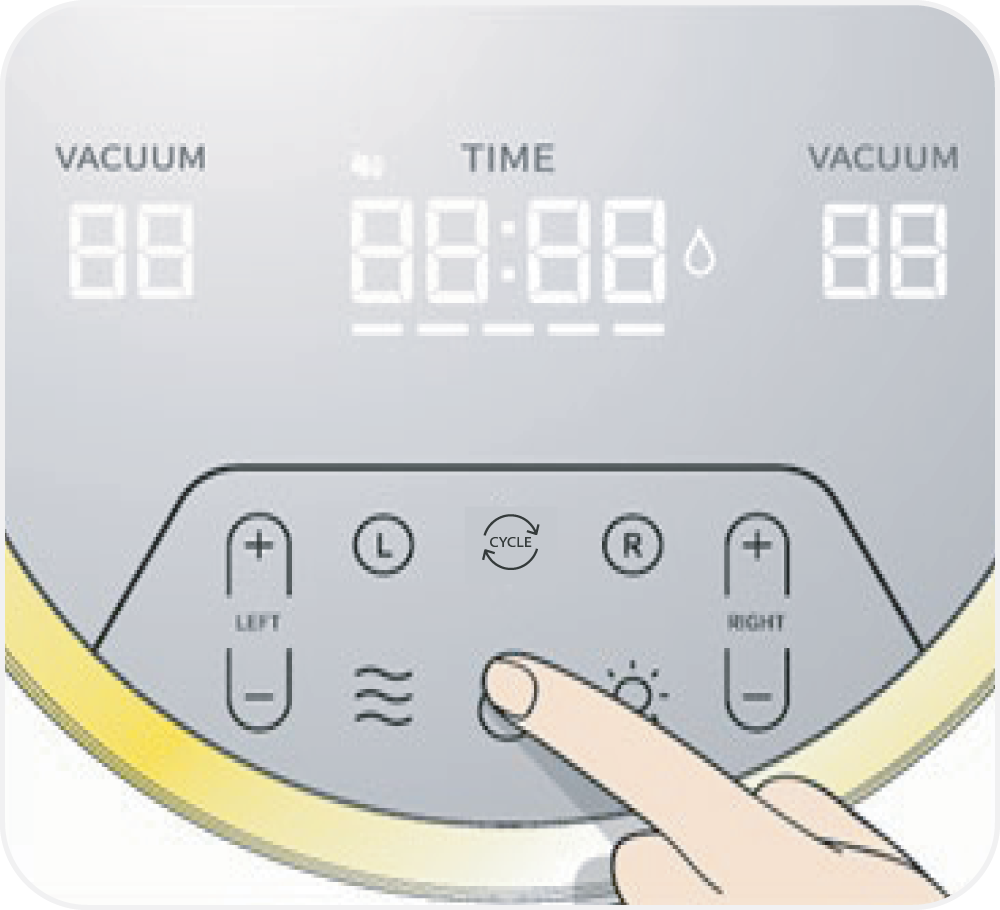
Adjust the cycle speed by pressing the CYCLE buton.
The cycle speed is measured in cpm(cycles per minute) on your breast pump and refers to how many times the pump 'sucks' and releases per minute. Your Spectra Synergy Gold has been designed with variable cycle settings so that you can find the setting that suits your body beast. Changing the cycle speed can make a dramatic difference in milk expression for some women. Everyone is different, so adjust the cycle speed setting to find what speed works best for you. Adjust the cycle speed by pressing the ⊕ ⊖ button.
Massage & Expression Modes
① Massage mode: In this mode, you have 5‑cycle speeds—64, 67, 70, 73, and 76 and 5 vacuum strength levels—L01‑L05. The ≋ 3‑wave symbol is displayed on the left side of the timer in massage mode. Use massage mode at the start of your pumping session or anytime you need to generate a let‑down during your pumping session.
② Expression mode: This mode has 5‑cycle speeds—38, 42, 46, 50, and 54 and 15 vacuum strength levels—L01–L15. In expression mode, a drop is displayed on the right side of the Timer Display. To adjust the cycle speed, press the drop symbol any time after you turn on the pump. Your cycle is the same on both sides (Left and Right) during pumping sessions—it cannot be set independently.
After letdown begins, once the milk is flowing, you should switch to expression mode, to start slower and deeper suckles, to draw down the milk. This mode has a slower cycle speed and higher vacuum suction level.
Please adjust the cycle speed and vacuum strength in expression mode and massage mode to find the combination setting that works best for you.
NOTE: TIP: The Spectra Synergy Gold remembers your settings automatically for your next session. If you want to start pumping on different settings than those used during your previous session, adjust the settings once you turn on your pump before you start pumping. Remember you will need to adjust the vacuum on each side, left and right, separately.
5. How to Use the Dual Pump
1. Remove the air cap.
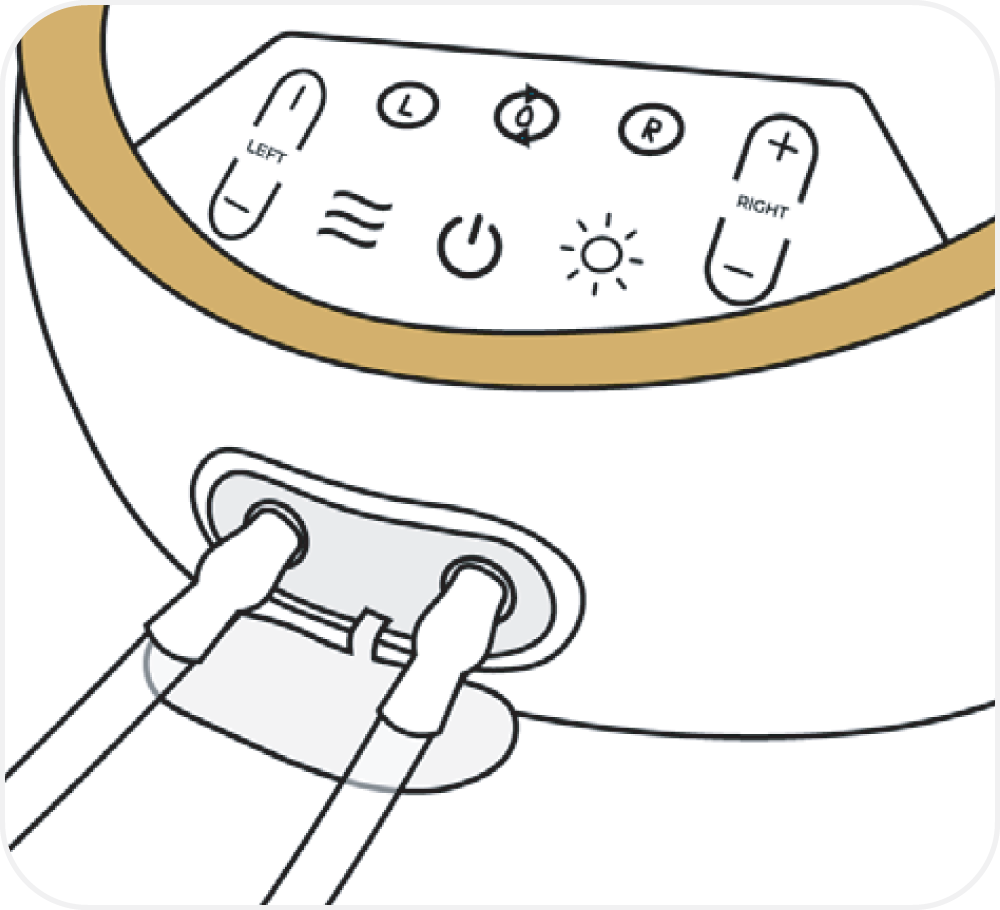
2. Connect tubing from each milk collection kit to an air nozzle.
6. Cleaning & Disinfecting
Sanitizing regularly before and after use and at least once a day is especially important if your baby is less than 3 months old, was born prematurely, or has a weakened immune system due to illness or medical treatment.
Sanitize Accessories Prior to First Use:
CAUTION: DO NOT WASH/SANITIZE THE TUBING.
It should never come into contact with breastmilk since the Spectra® Synergy Gold breast pumps are closed-system pumps.
NOTE: Use a designated basin to clean your pump parts; do not wash them in the sink.
First, wash all parts in warm soapy water and rinse well. Next, sanitize as detailed below. To avoid tearing or damaging the seals, never insert anything into the duckbill valves when cleaning them.
ACCESSORIES (CLEAR/YELLOW): breast flange, upper and lowercase of backflow protector, bottle, nipple mounting ring, bottle cover and airtight cap:
- Use a pot large enough to fit all your parts—if the pot is too small, parts discoloration and/or distortion may occur, damaging your parts.
- Fill the water so that when your parts are added, the water is at least 4" above the parts.
- Remove parts from the pot, place lid on the top of the pot, and bring to a boil.
- Once the water reaches boiling point, turn off the heat and then submerge accessories in boiling water—the water should continue to boil.
- Remove accessories after 3-5 minutes.
- WARNING: Do not boil for more than 5 minutes during sanitization process as parts may become distorted.
SILICONE ACCESSORIES (WHITE): duckbill valves, backflow protector membranes, and bottle nipples:
- Soak them in boiling water for no more than 2 minutes.
Place all cleaned and sanitized parts to dry on a clean paper towel to drain. Once the parts are dry, assemble the pump before you store or use it.
After Each Use:
- Disassemble all parts that come into contact with the breast and breastmilk - flanges, duckbill valves, bottles, airtight cap and backflow protectors.
- Wash each piece in warm soapy water and rinse with hot water.
- Place parts to air dry on a clean paper towel.
- Once the parts are dry, assemble the pump before you store it or use it.
*Using non-antibacterial soap is recommended to ensure that you are not leaving a film on your flanges that can impede the natural secretions from your mammary glands.
In the Dishwasher:
Parts can be cleaned in the dishwasher. Place items on wash cycle on the top rack using a closed top basket or a mesh bag, and air dry. Do not use heat dry.
PARTS: breast flanges, backflow protectors, duckbill valves, bottles, nipples, nipple mounting rings, bottle covers and airtight caps:
- Note: Cleaning the airtight cap in warm soapy water is recommended.
- Rinse bottle parts and any other feeding items by holding them under running water. The water can be warm or cold.
- Place parts in the top rack of the dishwasher. (Be sure to place small items inside a closed-top basket or mesh laundry bag so they don’t end up in the dishwasher filter.) If possible, run the dishwasher using hot water and a heated drying cycle (or sanitizing setting); this can help kill more germs.
- Wash your hands with soap and water before removing and storing cleaned items.
- Remove parts from dishwasher - If items are not completely dry, place them on a clean, unused dish towel or paper towel to air dry thoroughly before storing in an area free of dust or dirt. Do not use a dish towel to rub or pat items dry because doing so may transfer germs to the items.
NOTE: The above guidelines are for healthy, full-term babies. If your baby was born prematurely, has a weakened immune system due to illness, has other health challenges, or is hospitalized, consult your hospital and your child's healthcare provider for cleaning requirements.